

IP whitelisting is required for both the sandbox (test) and production environments. You configure it as a two-factor authentication (2FA) method in the Merchant Dashboard.
Prerequisites
Before you whitelist an IP address, ensure the following:- You have generated Secure ID API credentials. Secure ID client IDs typically start with
CF. Use Secure ID credentials, not Payment Gateway keys. - You have a public IPv4 address. Cashfree does not support IPv6, CIDR ranges such as
/24, or private IP addresses, including the10.x.x.x,172.16.x.xto172.31.x.x, and192.168.x.xranges. Whitelist only individual IPv4 addresses. - You plan to whitelist no more than 25 IP addresses.
- If your service uses dynamic or range-based outbound IP addresses, for example Render, IP whitelisting may not be feasible. Use the Signature Generation (Public Key) method instead. In this setup, the signature mechanism authenticates your requests, so you do not need IP whitelisting. To configure it: log in to the Merchant Dashboard, go to Developer, and under Two-Factor Authentication, configure your Public Key. Download the generated Public Key and use it to generate the API signature (
x-cf-signature).
- Log in to the Merchant Dashboard.
- Select the apps icon (nine dots), then select Secure ID.
- Select Switch to Test for sandbox credentials, or stay in production for live credentials.
- Go to Developers > Two-Factor Authentication and create the API key.
Whitelist an IP address
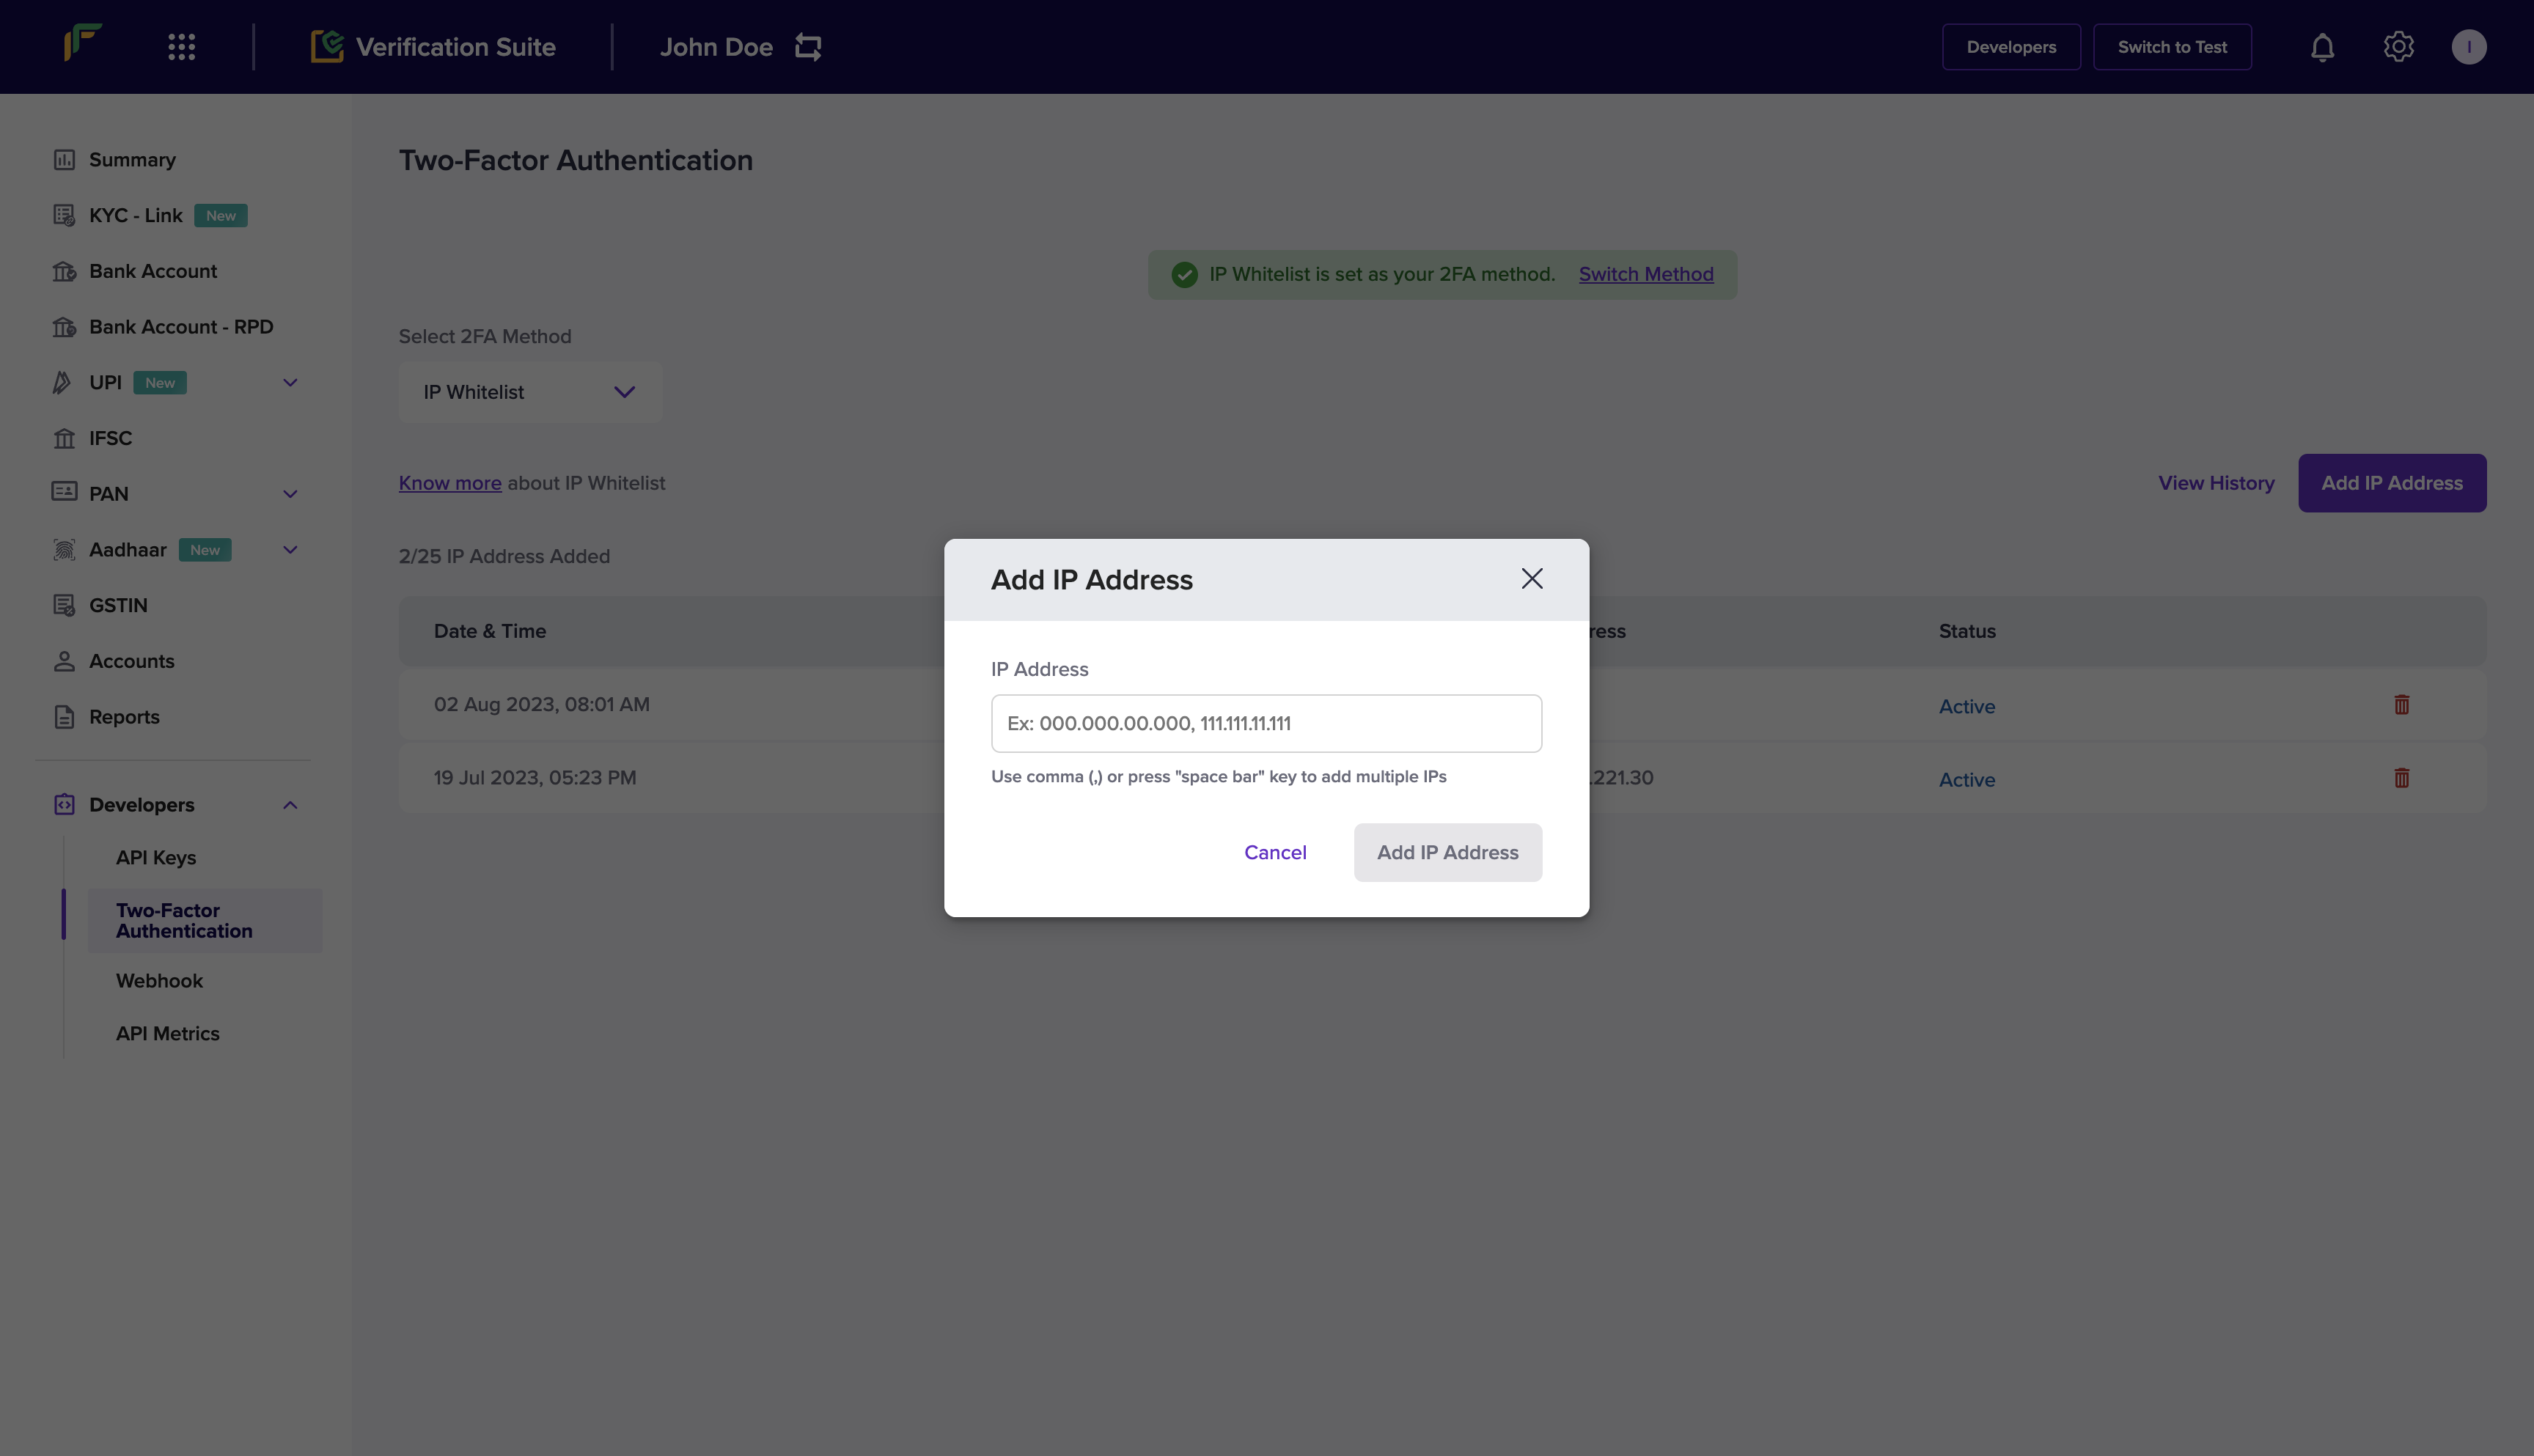
To whitelist your IP address, follow these steps:- Log in to the Merchant Dashboard.
- Go to Developers > Two-Factor Authentication under the Secure ID card.
- Select IP Whitelist from the Select 2FA Method drop-down.
- Select Add IP Address.
- Enter the IP address you want to whitelist and select Add IP Address to save.
Troubleshooting
If you receive anip_validation_failed error even after you whitelist your IP address, confirm that you are logged in to the Merchant Dashboard with the primary email address associated with the Client ID you are using. Configure IP whitelisting from the account that is linked to that Client ID.
Switch between 2FA methods
Complete these steps to change the active two-factor authentication method:- Log in to the Merchant Dashboard.
- Go to Developers > Two-Factor Authentication.
- Select Switch Method to toggle between IP Whitelisting and Public Key.
x-cf-signature header only when Public Key is the active method. Do not send x-cf-signature when IP Whitelisting is the active method.